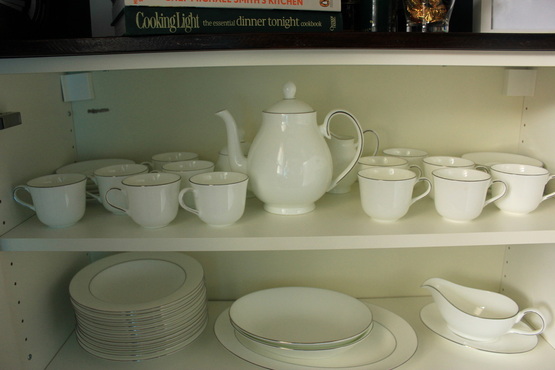
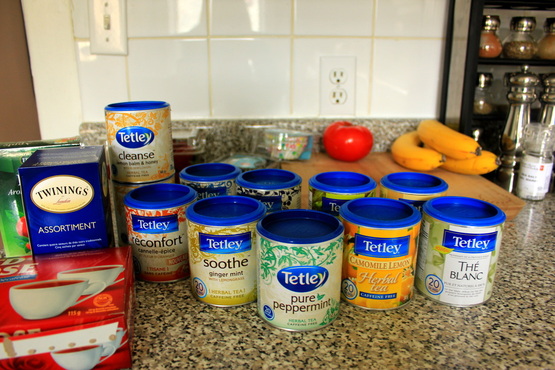
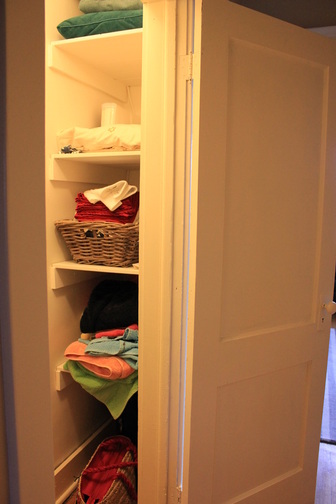
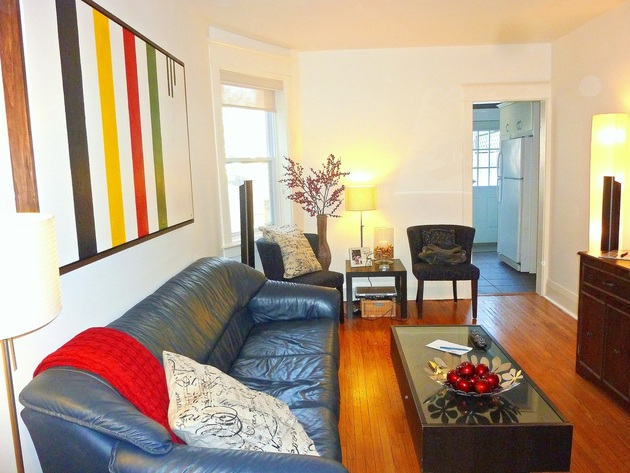
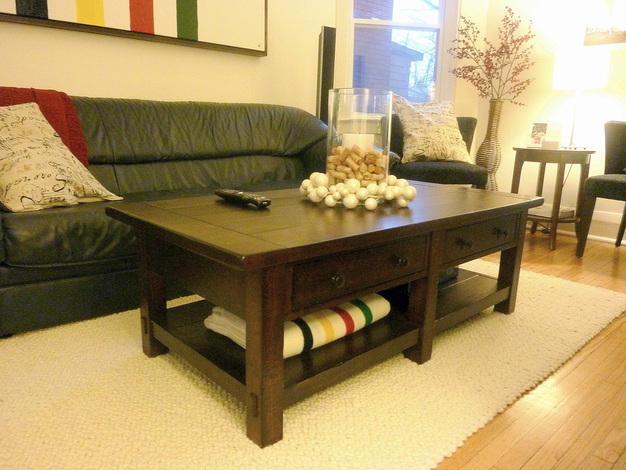
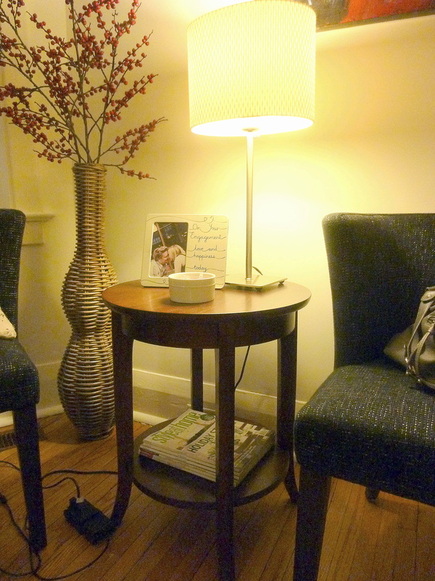
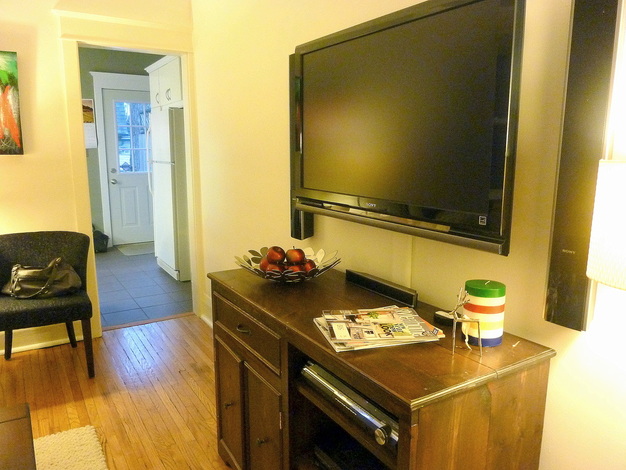
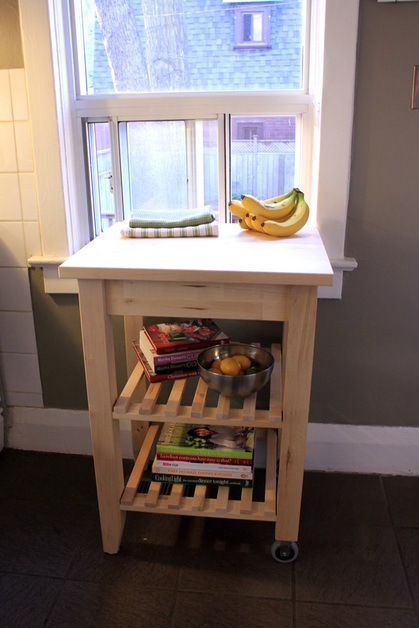
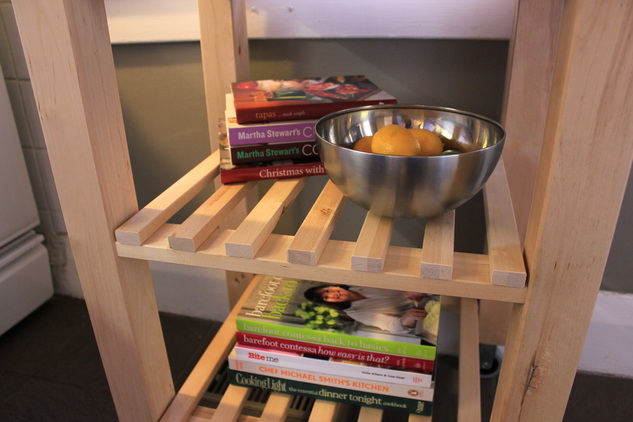
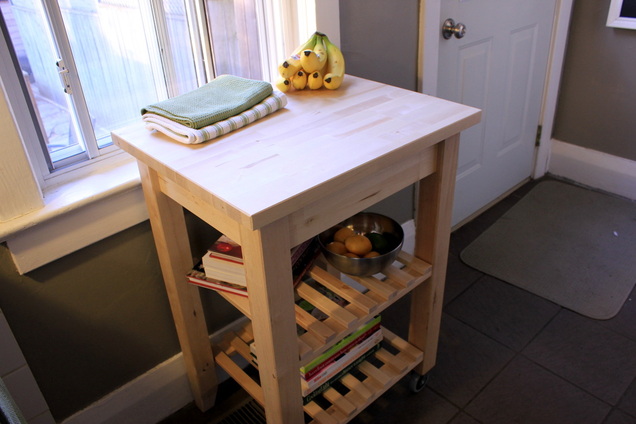
Last weekend during an Ikea trip we found a useful kitchen "island" for our teeny tiny kitchen. It is simple wood butcher block, and I'm planning to paint it a bright colour and sealing it in the summer. It is the Bekvam Kitchen Cart. Now we have a place for a few things that were taking our counter and dining room hostage, like random fruits and vegetables, and cookbooks. Best part? I put it all together MYSELF - I used two different screwdrivers and a wrench - no Allen keys here! No, there are no pictures, as usual. But here's some pictures of the finished and styled product: 
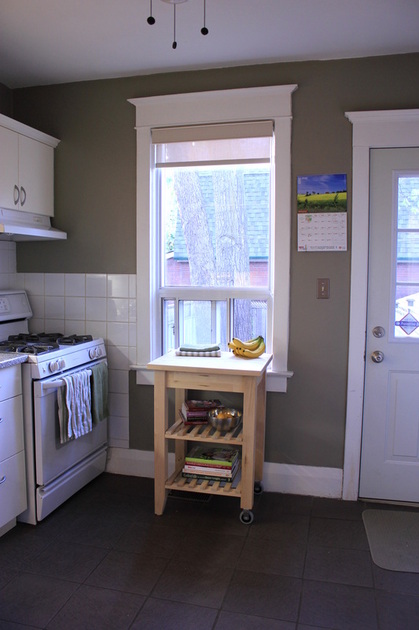
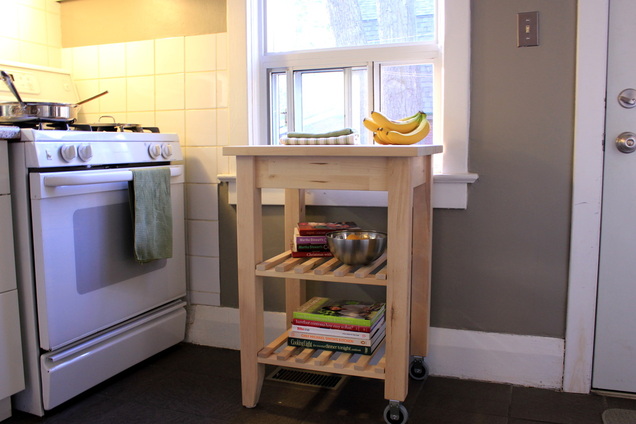
Yes, our kitchen needs a lot of work in general. Painting will be the temporary fix, but we actually want to completely redo it - change the layout, the backsplash, the cabinetry, and the flooring. Now if only we had the money...
1 Comment
Last Sunday I finally had the chance to start on the gardening - it is far from finished but what I did was a start. Mainly pulled out weeds, raked leaves, and tidied up the plants in general. Still need to mix in some fertilizer and topsoil, add some annuals, more weeding, pot some plants and hanging baskets, and water, water, water! Here are some before and afters of the front yard: Before - front little garden After - less leaves, but need to get a bush to cover the gas meter! Before - herb garden After - herb garden - top is chocolate and ginger mint, middle is german thyme, and bottom is transplanted rosemary that was randomly in the dividing garden (although I really don't remember it there last year!) Before - front garden - lots of leaves and white mossy plant taking over *Also, found at least 4 condom wrappers within the mix...what are people doing in my garden???* After - cleaned up the Adam's needles in the middle, and luckily the day lilies pretty much maintain themselves Before - another view of the front - the little purple flowers are taking over (they are supposed to just hang over the brick ledge), and the white-flowered mossy patch will eventually be everywhere! After - cut back the white flower mossy stuff and got rid of a lot of leaves plus turned the soil Before - middle garden and pathway - doesn't our neighbours' green grass look so much better? After - pulled out the red ground cover and did a LOT of weeding Another After - got rid of the gutter leaves and replanted the rosemary in the box above Here are some more random pictures from the front yard: Ewww our front porch needs to be cleaned... This is my fuzzy bee friend I really need to have kids, that way I can justify running outside screaming "ice cream truck, ice cream truck" without seeming like a crazy person...until then I sulk inside. Here are some pictures from the backyard - Matt cleaned the shed while I cleaned up the garden. Still need to tidy the stone, add some filler sand/soil for the cracks, and take all the random shed stuff to the dump. Glad to have the backyard space back so we can eat outside and enjoy some BBQ! Before - sad green plants a few weeks ago Matt cleaning the shed - very manly with the little watering can The only somewhat respectable picture that Matt took of me working...the rest were mostly of my butt...can you tell I'm sunburnt yet? (covered my VERY burnt shoulders with two white tank top lines by this point) Garden cleaned up and the bistro set out! Can't wait to build some bench seating and a coffee table! Bleeding hearts - these remind me of my grandma - she always had them in her front garden I always think these buds are going to become flowers but they just become more leaves! Such a beautiful day, despite our always late-blooming tree above Oh hello, Georgia, welcome back!
This past Sunday was Joni's family shower, which was hosted by Matt's mom, Lynn, and cousin, Mardi. I offered to make cupcakes and bring some things along to help them out, and it turned out to be a lovely afternoon of tea and catching up with family. Here are some pictures from the afternoon: Momma's condo party room - perfect for a tea party Now all we need is guests! The details - Gerber daises - one of Joni's favs I loved these beautiful blue and gold cups & saucers I seriously thought about stealing these... A bit proud of this - I needed a money box for the presentation shower, so I bought a red lantern from Pier One and covered it in love quotes - I gave it to her afterwards as a keepsake. One of my favs: "You know you are in love when you can't sleep because reality is finally better than your dreams" Meg was the greeter - good job little sis! The bride obviously practicing her "please stop staring at me" shower smile Ladies enjoying some sandwiches, tea, and dessert This is quite an unflattering picture of me but all the other ladies looked so nice... Aunt Connie with Meg! Mother of the groom Meg and I with two of Blair's beautiful daughters Joni's college roommates and bridesmaids Also thought about stealing Joni's gift...beautiful versatile candle holders/vases Passing desserts - chocolate dipped strawberries and red-velvet mini cupcakes Want a closer look at them? Mmmm cream-cheese frosting *Also making dark chocolate covered cake balls with the leftover cake and icing as we speak! The soon to be bride and groom - less than 2 months left!!!
Was just waiting for this to be created on the MadeByGirl site, as there has been a lot of demand for it since the coffee version appeared. It's really cute, and I think I might try a DIY version myself and frame it! Speaking of tea, next week Matt's cousin Joni is having a tea party shower, and I was organizing some things that I am going to bring, such as cake and cupcake stands (and red velvet cupcakes), and of course, teapots, creamers, and sugar bowls! Cupcake stand purchased from Home Sense last year for $20 (great find), cake stand from The Bay that we got as a wedding gift, along with the English Country Rose Royal Albert classic cake and tea set was also a wedding gift Oh yeah, and of course I have our wedding china tea service! I also went through all my tea when I was sorting out a cupboard, and realized I'm a bit obsessed with tea. I think I buy a new one every time I go to the grocery store, although I want to start getting some loose leaf instead of bagged. I threw out the ones that were years old and stale, and this is what was left: Red rose orange pekoe is a favourite on the weekends - it reminds me of my mom,
and pure peppermint in the evenings if I need to wind down Here are a few things I plan on doing around the house in the next few months that will not cost me a penny! 1. Organize the linen closet - it's a bit disorganized. When we first added the shelving and painting there wasn't much in it, now we have found a lot more use for it, so it needs to be reorganized. I have lots of extra baskets, so I won't have to buy anything to help me out. We also have hooks already that we could use, so all free! Closet last summer Closet today - needs some work... 2. Stain the TV unit - I already have the stain from doing the picture frame in the living room, and Matt already added a piece on the front of it that got ripped off (he literally ripped off a door when we lived in the condo) and stained it, so it really just needs to be sanded down and stained again. Have the sander, have the stain - all is free! Just a bit of stain to make it new again 3. Clean the front porch - my pretty chairs and table in the front are really dirty from the winter, and so is the porch. So I'm going to scrub and wash all of it, along with the windows and railings and stairs, and sweep the walkway and add some curb appeal that way, because my garden is definitely not doing it at this point. Porch last summer (geez, porch still pretty gross) Marmalade view of dirty chairs and deck last week 4. Organize the basement bookshelf - when we first built it, it was in the winter, and since it's colour coded (which by the way looks pretty, but is a pain in the a$$ to find the book you are looking for), it was organized based on the number of books we had at the time. In the summer or when we go on trips (and actually have time to read), we tend to rack up a lot more books, and in the past year we have accumulated a lot. Most of these books tend to have white or black spines, so those sections of the bookshelves are jam-packed. It's not quite working anymore, so I'll have to reorganize it. Bookshelf last year White books (behind the frame and first row there are a million more) *sorry for the bad picture quality, just taking quick shots* 5. Sew pillowcases - when we put the drapes down in the basement, we had a lot of extra fabric, so I decided to make matching pillowcases for some pillows that didn't really match the basement decor. So that still hasn't happened. I have the pillows, have the fabric, have a needle and thread. Just need to get on it! Fabric draped on the pillows...but not really a pillowcase yet...
Yesterday I featured some of the major projects of the year, and of course, with all of that, comes plans for the upcoming year. We have a list too daunting to tackle in a year - in fact, it will take multiple years, and lots of money that does not currently exist. Again, a lot of people ask me "what are you going to do when its all done?" - I just laugh and say that it will NEVER be done. I estimate it would take at least 5 years to get everything on our list done, and by that time, we'll probably want a bigger house, and it will all start again. Yes, the projects can be tiring, and straining, and frustrating at times, but they are also fun. I like watching the house evolve and I like that I can work with Matt to design our house. Oh yes, we disagree A LOT, but we have always agreed to not buy or do anything until we both agree on something. I won't ever come home with anything that Matt wouldn't like, and he won't rip out walls or do any handy-work until we've talked. That's how we work and not kill each other when our house is mid-renovation! Anyway, from the very daunting list, we've pulled a few things we'd like to get done in the next year, and I'll also discuss a few long-term projects that will eventually be addressed...maybe if we win one day through the Heart and Stroke Lottery Calendar my mom bought for us! 1. Paint, Paint, Paint! This is my major contribution in our house. My friend Mike likes to joke that Matt does all the work and I just crack the whip. Actually, he's not joking, I believe he thinks it really happens. He has a "Free Matt" campaign he would like to start - anyone want a t-shirt? Anyway, although I am not very handy (but willing to learn), I do have a lot of vision and ideas, and I also can PAINT. We painted our bedroom and dining room together, but I painted the living room and basement myself, plus the closet shelving. So there are a few places that paint is still required in our house, and luckily it's an inexpensive way to update a room! a) Hallways - both upstairs and downstairs. We got a quote from College Pro in the Spring for them possibly doing the hallways while we were away on the cruise, but it was pretty expensive so we decided to keep it as a DIY project. Now that my parents got Matt an incredible ladder for Christmas (it is like a transformer - it has SO many configurations), painting way up high will be a bit easier. We are probably going to paint the hallways the same colour as the basement - Benjamin Moore's Moonshine - it's a pale gray. It looks a bit off-white in the basement, but with more natural light, it will show up more grey. I am thinking about going a shade darker - not too sure yet. Check out the two last pictures and let me know what you think! The ceiling and trim will continue the "Cloud White" trend, as I want it to match all the trim of the other rooms. Current downstairs hallway colour - pale beige of sorts Upstairs hall - same colour - has a bit of gray undertone with natural light BM Moonshine in our basement on walls and ceiling - pale gray but looks paler here than it is BM Moonshine in Natural Light - via Young House Love on Pinterest One shade darker - BM Gray Horse via Leah Lee on Pinterest b) Spare Bedroom - right now the spare bedroom is the same seafoam green as was in the dining room. It actually doesn't look bad in the space, but it doesn't match the bedding and needs a fresh coat on both the walls and wainscoting. I'm not sure exactly what to do here - the duvet is chocolate brown and deep red on cream, and the sheets are deep red to match. I'm thinking about doing a brown (not too dark) on a warm cloud white wainscoting. What do you think? This will probably be my March Break project room! Here's the current green room colour An inspirational photo via Pinmarklet Another Pinterest find c) Railings - easy job - not sure if I'm going to stain or whitewash or what, but these railings need some finishing! Main floor railing - probably will stain to match the floor (or eventual floor) colour Basement railing - may be fun to add a bit of colour to this one? 2. Gallery Wall Not sure whether I will put a gallery wall of pictures in the dining room, or up the main floor stairs, or even in the empty space in the living room, but I definitely want to add a mix of photos and art in a collage in our house - they are always so interesting to look at! Here are some inspiration photos I like for various reasons, gathered from Pinterest. Also another project I can tackle myself! Like the black and whites - this would work best going up the stairs Perfect symmetry, which I usually love, but not the look I'm going for this time Very cool for a stairway! More black and white beauties of all shapes and sizes! Oh YHL, how I love your mix of pictures and art - great for the living or dining room! 3. Backyard Entertaining Space This was something we started to do last year with the tables, but we really want some bench seating with storage underneath to free some space chairs would take up. We could use it to lounge, or pull a table up for dining. Here are some inspirational pictures gathered from Pinmarklet. Current backyard - looking to add bench seating to that fence corner on the deck I like the back bench and the colourful top No storage, but still a simple bench design Sectioned pieces to move around the design I like the rustic look to this long bench 4. Gardening - Take Two So this year's gardening efforts were a fail. At least we now know what will spring up in the, well, Spring, and what we want to yank out and what to keep. The backyard is in pretty good shape, will probably just add in some annuals to fill it out. The front, however, is a jungled mess that needs some structure and good ol' TLC! Current back garden - nice and green Just needs a few pops of colour from some annuals Front garden/jungle Yeah...not really pretty... Thinking of sectioning off the front and creating a path Or adding some tiers to make it more organized 5. Lighting Purchases So we have a lot of bad lighting, and replacing them would be nice. We need new lighting for: the front hallway, the upstairs hall, the living room (ceiling and floor and table), the kitchen, the hallway closet, the spare bedroom ceiling (although I may just spraypaint this one and keep it), and the other spare bedroom. This won't be a rush, but we'll be keeping our eyes out for a good deal to replace some of these lights in the next year. Spare bedroom light - not too bad, but may spray it dark brown or brighter gold Upstairs hallway light - going to string a light from this outlet from the wall to the ceiling, and add a little chandelier Front foyer light - little chandelier needed here too! Other spare bedroom light - anything but this would be good Kitchen ceiling fan - never used, so simple lighting would be better Hallway closet light Living Room - already took out the bad chandelier and capped it, but now need a light to fill it! 6. Refinish the TV Unit This unit just needs to be sanded and stained to match our living room furniture - another March Break project. Just needs a little facelift! Future Projects These are some things we'll be looking to do, but doubtful within the year, due to budget, time, and sanity! Basement: new carpet in den/office and on stairs, built-ins for TV area in den, reinforced stairs, enclose and add storage beneath, move wall in bathroom back and get new vanity and fixtures and re-tile, finish laundry room and add storage. Kitchen: completely redo kitchen - new floors, cabinetry, appliances, lighting, and probably make half-wall into the living room with breakfast nook - may involve adding a small addition to the back - VERY FUTURE PROJECT! Living Room: get new couch, curtains Dining Room: get new dining table and chairs, curtains Main Floor Hallway & Stairs: new runner for floor and stairs Spare Bedroom: new room lighting, side table, mirror, curtains, rug Upstairs Closet: add hooks, more storage above Master Bedroom: new chaise for under window, curtains Middle Spare Room: this will probably be an eventual baby room, so will need to refinish gross parquet flooring, paint, add furniture, knock down door to closet and build storage, curtains, rug, all that baby-related stuff. With that will probably come baby-proofing the whole house? We do have a lot of sharp edges...I have the bruises to prove it! So yeah - the list never ends! There is probably many things I forgot too! Anyway, lots to keep us busy! Happy New Year! So I've looked back at the past year...technically we've only been in our house just over 10 months, but it's almost a year, and so I've compiled a list of the top 11 house projects of 2011. Actually, I did ask Matt for his input too, and our lists were quite similar. I'll mention the variations as I go. # 11: So Many Acorns... My attempt at gardening, better known as weeding and raking and talking to squirrels I only really put this in at # 11 to showcase what a little TLC in a garden can do. I am in no way a professional gardener...actually I am not a gardener at all. What little knowledge I gathered was from my mom, my grandma, and a coworker, Sonia, from whom I plan on seeking much more future advice. Anyway, this year we decided to see what would pop up in the garden and go from there. "Go from there" meant staring at our crazy garden and not knowing what to do with it once it exploded into life. I decided to start small - weeding our back stone, raking years of leaves from between the budding flowers, and constantly sweeping away acorn pieces that littered the backyard. My friends Jess and Carolyn contributed with a pretty little purple plant which I potted, only to have it torn apart by a squirrel the following day. So....house project fail? Perhaps, but at least we'll be aware for next year, and have a head start on what to do then. That's our house on the left, when we first saw it in November A close up of the front garden in November The backyard was in better shape than the front, even in the fall With a little weeding and TLC, the front garden was very green and lush, if not a bit wild for my taste... I have since removed some of the old wood chips and done a lot of soil turning Stole our house light, but added some colour to the drab backyard Oh yeah, and amidst my outdoor adventures, I made a friend that loved me enough to do this when I went inside ...and George is still here today, sometimes with his lady friend Georgia, and although looking chilly in the snow, he is happily taking shelter in the neighbours' shed when he's not visiting me # 10: Ahead of the Trend Painting the Dining Room Navy For once I had an idea that came to be before I saw it in the multiple house magazines I read. I wanted to paint the dining room a dark blue, and we ended up choosing Newburyport Blue by Benjamin Moore. My first idea was actually to use navy Phillip Jefferies grasscloth, but the amount of work wallpaper adds and large increase in price all lead to paint being the better choice! It is dark and rich, and adds some drama to our main floor. It was a drastic change from the seafoam green that was left behind, but it was a fun change! Here it is shortly after we moved in Moment of truth - first cutting in! Of course it wouldn't be painting without me getting it in my hair... After two coats, it was done! Looks darker in the evening, and more blue in the natural light, but I like it either way # 9: Musical Chairs Rearranging the Living Room Defining the space wasn't a major project, and involved more purchases than anything, but figuring out what to do with our dining room turned living room space was a first step in creating a welcoming environment in our house. I just did a post like this recently for the living room, so I'll keep it short. Living room our first day in the house, although you'd be surprised how often your house looks like this during renovations and painting and pretty much always when you don't have people over or aren't staging pictures! After some chair and accessory purchases, we played musical chairs with the layout More furniture purchases,displaying some art work, and mounting the TV, the room is much more complete! *Note - Matt put the TV mount in his Top 11 list - I wanted to get a smaller TV and get much smaller speakers instead so I did not add this to the list of major jobs, but I will admit it looks better now! Once we get rid of the tree, I will post pictures that do not have a holiday theme! # 8: We're Definitely Not in the Suburbs Anymore Front Hallway Storage without a Closet When you are looking at a house for the first time, you miss many things, like the fact that there is no hallway closet. That isn't surprising in Toronto, but in the suburbs, it's a staple....so is a grand foyer (pronounced FOY-AY and not FOY-ERR like in US), but at least we anticipated it being missing. So when it came to organizing our coats and shoes and everything else, we were at a loss. We have some closet space in the basement, which is where the majority of our coats and winter gear and some shoes live, but our day to day stuff needed a space that wasn't on the back of chairs or scattered throughout the hallway. So when I saw this post on Young House Love, I headed straight to Ikea to get a storage unit of my own. It was perfect for our narrow front hall, but we still needed coat storage. Home Depot had some hooks that Matt installed and we were set after a bit of decor. State of the hallway on our first house tour post-purchase Super-skinny shoe storage! Hello, shoes! Goodbye clutter! Coat racks pre-hooks Coat racks post-hooks - much better. Oh yeah, and the mirror helps a bit too with decorating the space A little front curb appeal always helps the hallway too! # 7: An Indoor Fence...Another Reason to Hate Home Depot The Master Bedroom Lattice Headboard This project started when Matt decided he wanted a headboard. He wanted to make it out of distressed wood, but with our fancy wardrobe and more modern finishings, I didn't think it would go. Then during a trip to Home Depot to pick out trim for the basement, Matt sees lattice fencing, and gets all creative and wants to build the headboard from it. I can't see it, refuse to buy it, and that's that. But with constant lattice obsession, I cave and he goes back to get it for our room. Ohhhhh Home Depot...the bane of my existence. Yes, it helps us on projects, but it seems like we live there sometimes, and creates new projects that were never meant to be. Again I end up liking the end result, so I can't complain too much I suppose. Before the headboard and other decor Lattice headboard done - painted and mounted to the wayy Other view, with some furniture upgrades thrown in too # 6: Grade 10 Optics Lesson in Practice The Dining Room Mirror Construction Again I did a recent post on the mirror, so this won't take long. The mirror was on the ground since we moved, because I wanted a nice frame around it so the screws into the wall wouldn't be seen. This project was put on hold for a while, but eventually we got some wood to back it, and Matt took over, building the frame, spray painting it black and then silver (the original idea was the sand some of the silver back to give it a tarnished look, but we only did this a bit because it looked better all silver), and then mounting it to the wall. I used this application on my grade ten optics test about adding light to a room without buying more lights - most of my students got it right - add a mirror, which also makes the room appear larger. Teacher WIN! This was in our dining room for a long time before it became part of a mirror... Skipping a few steps gets us here - to a framed mirror in my basement Spray painting outside - at this point I thought George got into the paint, but it was another squirrel altogether... Spray paint takes a LONG time to dry when its zero degrees outside End result? Pretty mirror and brighter dining room (with Christmas prep well underway) # 5: Making Martha Proud Organizing the Linen Closet The linen closet upstairs was a disaster to start with - the "organizer" that was there was not a practical use of the long and narrow space, so I designed the way I wanted it to be, and Matt built me some beautiful shelves, which I primed and painted, and then filled up the space. There's still space now to rearrange or add more storage which I like. Original "organizing" system left by owners Matt's shelves - cedar - it smelled like a beautiful sauna in here for weeks! ...until I painted them - primer and 2 coats later the paint stuck ...and more paint in the hair... More space and organization! Oh Martha Stewart would be proud...all that's missing is a tiny chandelier above (hmm, that's a good idea!) # 4: Matt Plays Carpenter The first house project: the built-in basement shelving The first project we tackled in our house was the basement. I needed a workable office space and the couch wasn't cutting it. We were going to go Ikea crazy (which we sort of did anyway), but Matt wanted to do some built-ins of his own in a little corner nook. Along with that came filing cabinets and closed storage cupboards, which ended up looking great! To be honest I did not have any faith he could do it, since I've never seen him do anything like this besides painting and some light repair work around our old condo. Wow - did he ever show me, and now he may do some more built-ins in the TV area on the other side of the chalkboard. My "office" shortly after we moved in The carpentry begins - not an easy feat with slanty walls and floors Shelf faces on, doors made Primed and painted DONE! The colourful bookshelves were thanks to Ikea and my decor More storage for all the binders # 3: Long Live the Home, Short Live the Marriage The PAX Wardrobe Assembly So I will admit that Ikea products have come a long way, even in the past few years. We have a lot of stuff from there, but our first HUGE purchase was the PAX Wardrobe system for our bedroom. We have a tiny closet, and we really needed space for clothes. That closet now only holds my dresses and our laundry. Build this yourself at your own risk - it is heavy and big and frustrating to construct with an Allen key and I swear for a few hours I did not want to be married or live in a house with this wardrobe. Once it was all done and assembled I calmed down and realized that I now had a closet and my husband back, and it was good. It fits perfectly in our bedroom and stores everything we need! It will be staying when we eventually move, and the new owners better appreciate our effort! Old owners wardrobe system DAYS later... Ahhhhhh done! Oh how I love organization! Ooooh it lights up! # 2: Copyright Infringement?: Our Hudson Bay Point Blanket Painting So I wanted a sort of comfy rustic look to our living room, and I thought that maybe a great Canadian-themed painting would tie it all together. Matt's parents have an HBC Point Blanket at the cottage, and I love the Queen's colours simplicity, and Matt thought he could paint it. He did paint in high school, so we got a canvas and a laser level and took a shot at it! Laser level on coffee cup painting accuracy! Colourful! Frame was built and stained too, because having it framed was a ridiculous cost! Done and goes perfectly in our living room This was actually Matt's # 1, since it was his actual "Work of Art" # 1: Wedding China Does Not Belong in the Basement: The Dining Room Sideboard This was my # 1 project because I think it really pulls the dining room together, it gave me an appropriate space to put my wedding china, and it helped a lot on Christmas Eve when organizing and serving all of the food. It will add a lot of value when we sell, and it just looks so damn pretty! Of course it starts off with the wine racks Which becomes shelves That get lifted off the ground and closed up with doors Ohhh Royal Doulton - how pretty you are in your new home I painted the baseboards to match the trim in our dining room And a beautiful poplar stained top to finish it all off! Add some new lights and decor and that's one great dining room piece! Good job, us! What a great year! Didn't Make the Cut: The Great Fall Stair Railings Project Funny enough, I didn't even consider this project. Yep, in October I fell down the basement stairs. It was definitely more my general clumsiness than the lack of railings, but we figured it was just good sense to add them in, so we did - to both staircases! Matt had this in his list instead of gardening at # 11 - because he obviously thought my gardening was less than stellar... Odds are I will fall again, at least this time I will have something to grab onto! So that's it - our 11 top house projects of 2011! I will let you know right now that this post took about 5 hours to complete, with breaks here and there. Figuring out what to put in, formatting, uploading, writing...wow it takes a long time. Up next? House Resolutions for 2012! So since we have been renovating a lot lately, and the last major post was about the dining room, I figured I would do one about the living room as well. Here it is, over a year ago, before we even moved in, followed by when we moved in 10 months ago: Yep, it was a dining room... Evening we moved in We really didn't do much with it until June, when we painted: Benjamin Moore's Cloud White on the walls (eggshell) and trim (semi-gloss) Then not much again until the fall, when we did some rearranging to accommodate some new chairs, and then we kept going from there. Here are some pictures of the new "stuff" and how the living room looks now: New navy chairs, wicker vase with holly, pillows, and stool, all from Home Sense HBC point blanket canvas that Matt painted and framed - see that work HERE Room today - with new carpet, coffee table, side table, LOVE painting, and mounted TV and front speakers The coffee table is the Benchwright Coffee Table in Mahogany from Pottery Barn - we used all of our PB and WS gift cards from our wedding towards this purchase and didn't spend a cent of our own money! The carpet is from West Elm and is called the Tangle Rug, in the cream colour. *Also notice the HBC fleece point blanket my mom got to go with our room This is the Chloe Side Table, also in mahogany, also from Pottery Barn The TV and front speakers are now mounted and can turn side to side. This involved a lot of wiring behind the walls but nicely covered in the middle, which leaves us with a "mantle" space of sorts Matt's parents bid on this painting by Susan Meingast at a charity auction this past summer, and gave it to us as a gift - it goes perfectly in our living room, and actually has the word "love" written throughout it in multiple places Different views of the room Most of the major Christmas stuff is put away, except for our tree! So that's our living room to date! At some point we will stain the TV hutch to match the other furniture pieces - it's a bit beat up and needs it badly. We are also going to get a new couch, and some new lighting. No rush at this point - I'm pretty happy with the way the room turned out! We started the sideboard project a while ago - you can read about the progress here and here and here...our dining room before we moved in looked like this: This is after we moved in and painted it with Benjamin Moore's Newburyport Blue: Then once it was built, it looked like this: Now finally, it looks like this: Finished Room - still decorated for Christmas...I really need to wash all that linen and clean the tableware... The last phase of the project was adding a top to it. We originally were going to go with granite or quartz, but after I saw this post from Jen Ramos' Made By Girl blog, I knew that I wanted to use wood. Here's her sideboard, and she used Ikea cabinetry too - this eerily came out less than a week after our cabinets were installed - it was clearly fate! Here's my inspiration picture: Once wood was clearly the way to go, we had to decide on a wood and stain. We thought oak or maple would be good solid choices, but those come with a hefty pricetag. I went back to Jen's post and saw that she used poplar, which is a soft wood, but is still suitable for kitchen surfaces, as long as it is treated properly. We spent $70 on the wood, cut to our exact specifications at Home Hardware, instead of the $250+ we would have spent on oak or maple. Here it is when we got it last weekend: Then we used Minwax's Pre-Stain Wood Conditioner, which supposedly allows it to soak in and prevent all of the stain from soaking into the soft wood and lessening the number of coats of stain required. You only had to leave this on about 20 minutes, then it was safe to stain. We used Minwax Stain in MIssion Oak Gloss, which is a medium-dark brown. It was actually a stain and polyurethane in one, since we needed to seal it too. It took two coats, each done a day apart and with a very fine steel wool sand between, and then we left it for a few days before attaching it to the cabinetry. We noticed it was a bit tacky, even after several days, so after a few quick Google searches, the answer was found. A very light sanding with oil (we specifically used baby oil, lol), and then finishing it all up with automotive rubbing and polishing compounds, back to back. Wow...it was a lot of layers of things, but the result is a healthy, shiny coat (geez, you'd think I was talking about a horse...) that looks great in the dining room! Stain Coat # 1 Stain Coat # 2 - Much glossier! Finished product, now glossy and smooth! View from the hallway Oh yes - and you can see our two new sphere table lamps from West Elm we got last week to go on each end A little sparse right now in terms of decor...but it's getting there!
At least it's done before Christmas! So this mirror has traveled with me all over the place - it started off in my bedroom when I lived with my parents, even while I was at university in Kingston. I don't have any pictures of it there, but I do have them from my two places before the house - my first condo when I lived in a teeny bachelor apartment, and my second when Matt and I lived together! My girly first place, with lilies from Matt, and my big mirror on the wall Our much more gender-neutral second place, with our loads of wine, and my big mirror on the wall Our blue dining room in our third place, with wine and not much else, and my big mirror on the ground... ...waiting to be put up on the wall! So to mount this mirror, we wanted to put a frame on it, so that the little clips wouldn't show. This required a backing to start! Then when the backing was on, wood glued on to even out the mirror and backing around the edges *see - I told you you'd see those textbooks a lot!* All glued - phase one done! I don't have any Matt sawing pictures, but it took a lot of work and a miter saw helped! Now for more glue and overnight waiting... Phase Two done - but it still needs some paint, and a backing to mount it to the wall! Spray painting the first coat - black Spray painting the front frame black We used Rustoleum's Glossy Black Then I saw this squirrel, and somehow thought George got into the spray paint... ...I seriously thought PETA would be on me for SURE! ...but it wasn't George...he appeared seconds later to claim his territory...phew!!! Coat # 2 - in Rustoleum's Specialty Metallic ...then it started raining...I no longer have use of my kitchen... After a second silver coat, the brackets were mounted on the wall The lonely wall - pre-mirror! Done! Makes the room so much brighter! Lets what little light we have during the day double! Last one...with my new West Elm lights on the sideboard (the wood top will be in tomorrow!)
|
KathleenAdventures in married life, cooking, teaching science and new home renovations in the city! LinksArchives
June 2015
Categories
All
|